
What Is the Right Typing Finger Placement for Accurate Typing?
Get the right typing finger placement techniques to improve typing speed, accuracy, and comfort while building better keyboard habits.
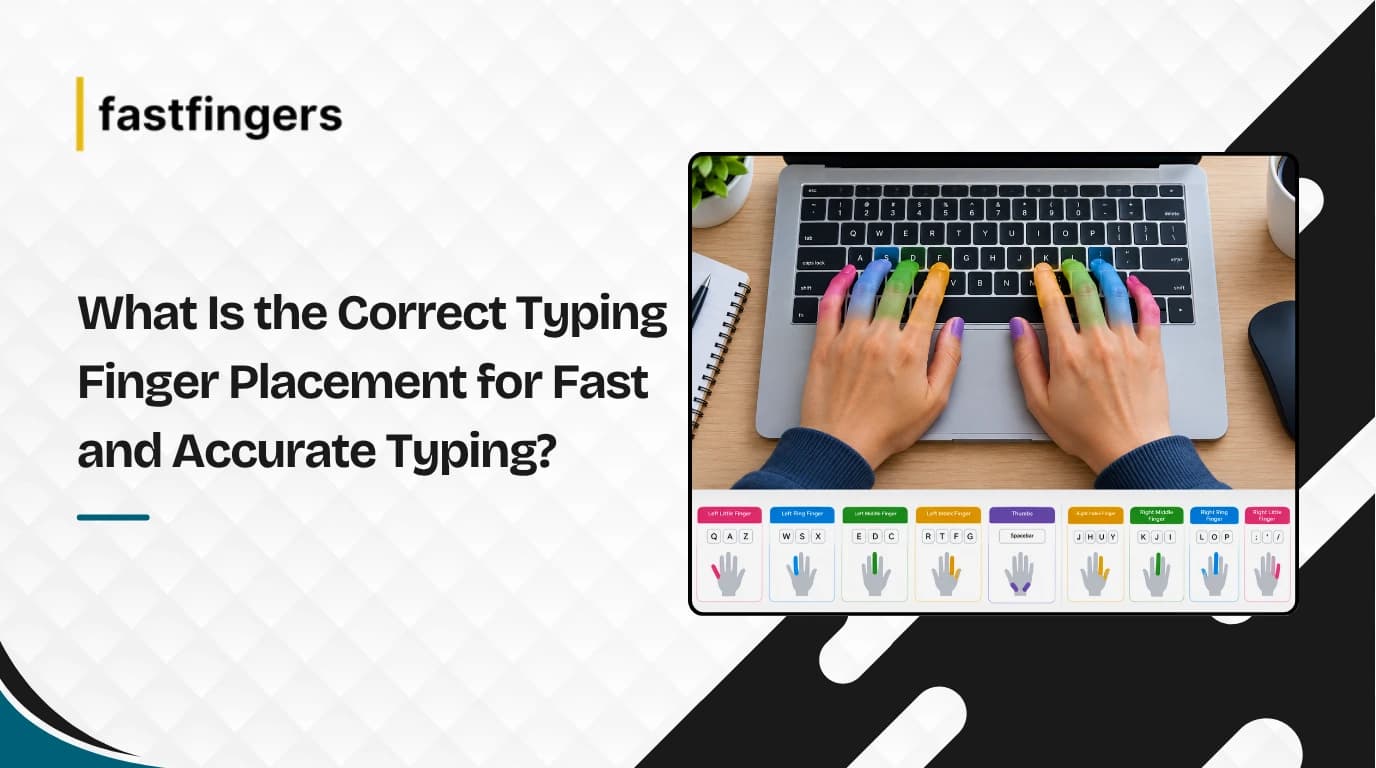
What Is the Correct Typing Finger Placement for Fast and Accurate Typing?
Every finger has one job. That is the whole idea behind Typing Finger Placement, and it explains why some typists never glance down at the keyboard.
The home row is where it starts. Rest your left hand on A, S, D, F, and your right hand on J, K, L, and the semicolon key, and you already have the foundation most fast typists rely on.
What Is Correct Typing Finger Placement?
Correct Typing Finger Placement assigns a fixed set of keys to each finger, so no finger wanders far from its job. Over weeks of practice, this turns into pure muscle memory.
The home row keys act like a home base. After pressing any other key, the finger comes back here automatically, without you thinking about it.
Below is the standard finger chart typists follow:
| Finger | Left Hand Keys | Right Hand Keys |
|---|---|---|
| Pinky | Q, A, Z | P, semicolon, slash |
| Ring | W, S, X | O, L, period |
| Middle | E, D, C | I, K, comma |
| Index | R, F, V, T, G, B | U, J, M, Y, H, N |
| Thumbs | Space bar | Space bar |
Once this chart becomes second nature, Typing Finger Placement stops feeling like a rule and starts feeling like habit.
Why Does Typing Finger Placement Matter for Speed?
Speed comes down to wasted motion, or the lack of it. Typing Finger Placement cuts down how far your hands travel, and that alone lifts words per minute noticeably.
Without it, eyes keep dropping to the keys to check where fingers landed. That habit alone slows a typist down more than any missing skill.
There is also a physical side to this. Wrists stay in a more neutral position when Typing Finger Placement is followed correctly, and fingers travel in small, efficient paths instead of long stretches across rows.
Which Fingers Handle Which Keys in Typing Finger Placement?
Each finger owns a column, not a random scattering of keys. That structure is what makes Typing Finger Placement predictable, no matter how fast you type.
- Pinky fingers cover the outer edges, including Shift and Enter
- Ring fingers take the second column from either edge
- Middle fingers manage the third column on both sides
- Index fingers stretch slightly to cover two columns near the center
- Thumbs are reserved for the space bar
New typists often skip this structure and improvise instead. It works for a while, but it caps how fast anyone can go, which is why touch typing tips almost always start with this exact chart.
How Do Touch Typing Tips Support Typing Finger Placement Accuracy?
Accuracy comes from training the fingers to work without the eyes checking in. That is the entire point of touch typing tips, and Typing Finger Placement is the method that makes it possible.
Posture matters more than people expect. Relaxed shoulders and straight wrists, rather than bent ones, cut down fatigue over long sessions.
Short sessions beat marathon ones. Ten focused minutes teaches the fingers more than an hour of tired typing.
Sites like FastFingers.in pair touch typing tips with live speed tracking, which makes it easier to see whether the habit is actually forming.
Also Read: 10-Finger Typing: Complete Guide to Touch Typing (2026)
What Mistakes Ruin Good Typing Finger Placement?
Most mistakes trace back to one habit: looking down. The moment eyes leave the screen to check the keyboard, Typing Finger Placement starts to break down, and old shortcuts creep back in.
- Fingers drifting away from the home row
- Relying on two fingers instead of all ten
- Pressing a key with whichever finger is closest, not the correct one
- Slouching or bending the wrists while typing
None of these mistakes are permanent, but they take longer to unlearn than to learn the first time correctly.
How Can Beginners Practice Typing Finger Placement Every Day?
Daily repetition beats occasional long sessions, every time. A beginner who practices Typing Finger Placement for ten minutes each morning will likely outpace someone who types for an hour once a week.
Start on the home row before moving to full words and sentences. Rushing this step is the most common reason beginners plateau early.
- Practice for ten minutes each morning
- Track progress with an online typing test
- Stick to one finger pattern instead of switching mid-practice
- Look back at mistakes after every session
FastFingers.in offers daily drills built specifically around this kind of practice, which helps keep the routine consistent.
A good next step is working through FastFingers typing lessons, which are built around this same daily practice approach.
Frequently Asked Questions
What is Typing Finger Placement?
It is the method of assigning each finger to a fixed set of keys, starting from the home row, so typing eventually needs no visual guidance.
How long does it take to learn Typing Finger Placement?
Most beginners notice a real difference within two to three weeks of daily practice.
Are touch typing tips useful for working professionals?
Yes. They help professionals type faster and avoid the hand fatigue that comes with long work hours.
Can adults learn correct Typing Finger Placement?
Yes, at any age. Consistency and posture matter far more than starting young.
Which website helps practice Typing Finger Placement?
FastFingers.in offers structured lessons and speed tests built around this exact method.